
An EV charger with a timer lets you delay when charging starts. Some models also let you set start and stop times or repeat a schedule on selected days. Scheduling can reduce your electricity costs if your plan offers cheaper rates at certain times.
Depending on your equipment, you can schedule charging through your car, the charger’s app, or buttons on the unit. This guide explains the differences between timer functions, how to schedule charging at home, and what to check when charging does not follow your schedule.
What Is an EV Charger With a Timer?
An EV charger with a timer controls when charging can begin. Depending on the model, you can delay the start or set a charging time window.
For example, you might plug in at 7 p.m. and set charging to begin at 11 p.m. The charger waits until that time, but your vehicle must also be ready to accept power.
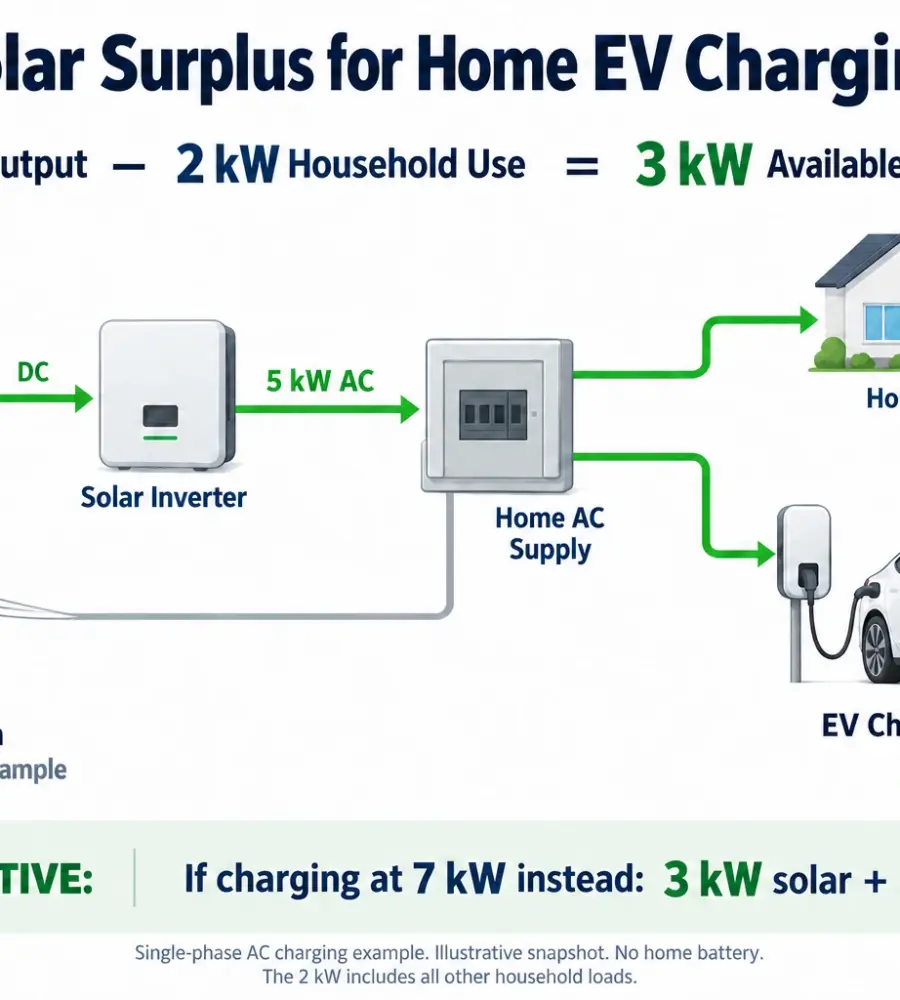
When comparing home EV chargers, check which scheduling options the selected version includes. Automatic responses to changing electricity prices or solar output require additional control features. Charging speed still depends on the vehicle, charger, and available electrical supply.
What Types of EV Charging Timers Can You Choose?
EV charging timers can delay a session, start it at a set time, or limit charging to a time window. Some vehicles and charging systems also offer a target completion time.
| Timer Function | Example | What to Check |
| Delay Timer | Start after a four-hour countdown | Whether you need to reset the delay for each session |
| Scheduled Start | Begin charging at 11 p.m | Whether you can also set a stop time |
| Charging Window | Allow charging between 11 p.m. and 7 a.m | What happens when the window ends |
| Ready-by Target | Aim to reach your chosen charge level by 7 a.m | Whether the system supports this target and how it calculates charging time |
The option to repeat a schedule is a separate feature. A charging window might apply once, every day, or only on selected weekdays. Check the repeat options before assuming that tonight’s settings will run again tomorrow. A ready-by target also depends on having enough time and available power.
Time settings and battery charge limits serve different purposes. A four-hour session does not specify a final battery percentage. Set a charge limit through your vehicle or another supported system when you need charging to stop at a particular level.
Should You Use the Car’s Timer or the Charger’s Timer?
Use the timer that best matches your routine, with one system managing the schedule. Both the vehicle and charger must allow charging during the planned hours.
| Scheduling Method | When It Makes Sense |
| Vehicle Timer | Your car already provides the charging times and repeat settings you need. |
| Charger Timer | You want to manage charging at home through the charger’s app or onboard controls. |
Keep your vehicle’s battery charge limit set as needed, whichever timer you use. Choosing the charger’s schedule does not mean turning off the car’s charge limit.
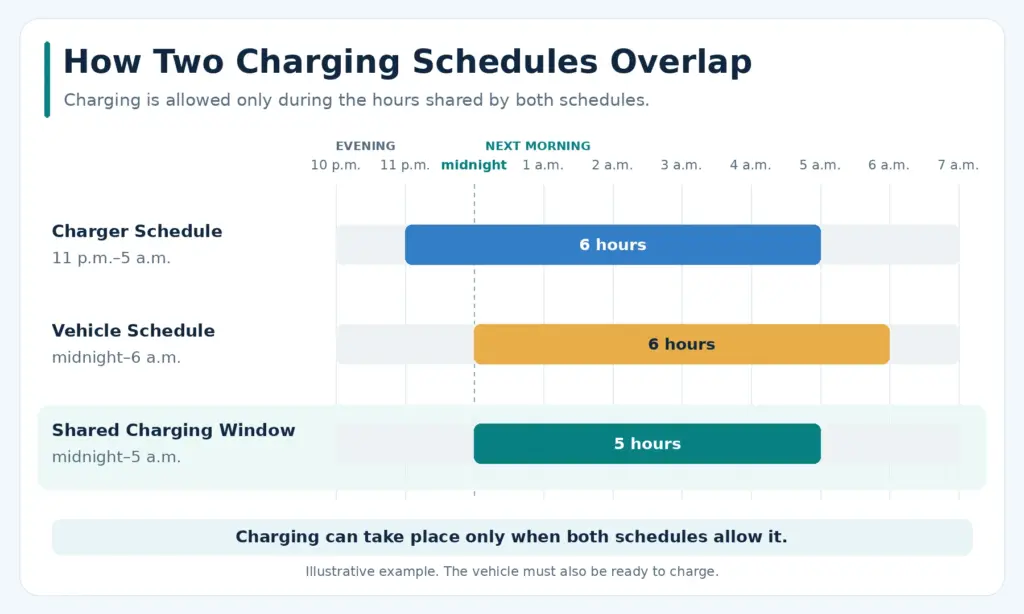
Two active schedules can shorten the available charging time. For example, a charger allowing charging from 11 p.m. to 5 a.m. and a car allowing charging from midnight to 6 a.m. Charging is therefore possible only between midnight and 5 a.m., provided the vehicle is ready to charge.
Check for another control source if your electricity provider or home energy platform manages charging. Its schedule may also affect when the session runs.
How Do You Schedule EV Charging at Home?
To schedule EV charging at home, choose your charging hours, enter the timer settings, and confirm that the plan is active. Follow your vehicle and charger instructions for the connection and activation sequence.
1. Check Your Available Charging Hours
Find the lower-rate periods in your electricity plan and compare them with the hours your car will be parked at home and your next departure time. Leave enough time to replace the energy you need.
For example, a lower-rate period from 11 p.m. to 7 a.m. provides an eight-hour window. Your actual charging power determines how much energy you can add during that time.
2. Set the Timer and Repeat Options
Open the scheduling controls in your vehicle, charger app, or charger itself. Use one main scheduling method and check that other settings allow charging during the same hours.
Enter start and stop times if your equipment supports a charging window. For a delay timer, select the waiting period and confirm when the countdown begins.
Check whether the setting applies once or repeats. For an overnight schedule, confirm how the selected day relates to the session. Monday at 11 p.m. to Tuesday at 7 a.m. crosses midnight.
3. Prepare the Vehicle and Confirm the Plan
Check your vehicle’s battery charge limit and complete any required app or RFID authorization. Follow the manufacturer’s instructions for when to connect the vehicle, as some controls must be set before plugging in.
Save and enable the plan, then check the available confirmation on the vehicle, charger, or app. Look for the selected time range, an active schedule, or a waiting status. A time entered on screen does not necessarily mean the schedule is enabled.
4. Check the First Scheduled Session
Review the first session’s actual start time, end time, and delivered energy using the records available to you. Confirm that charging followed the plan and provided enough energy for your journey.
Check the settings again after using an immediate-charge option. Depending on the equipment, the original plan may remain active or need to be restored.
Scheduling With an App or Onboard Controls
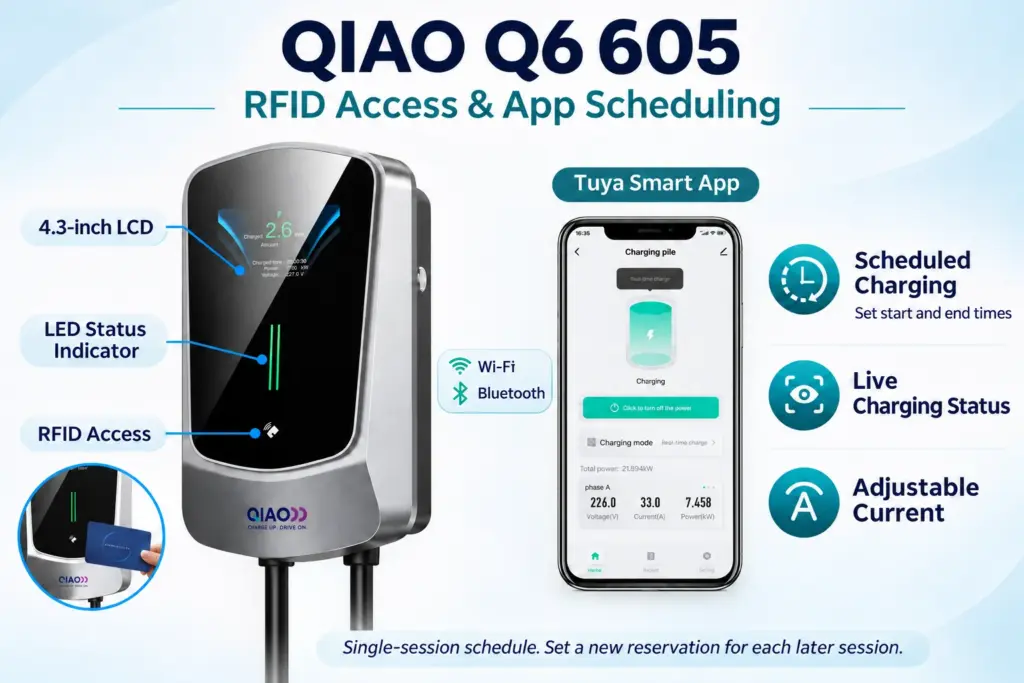
App scheduling can suit drivers who want to arrange charging from their phone. Selected QIAO Q6 home charger configurations, including the 605 version, support scheduling through Tuya Smart. With the charger switched on, select the device, open the charging mode settings, and confirm your start and end times before connecting the vehicle.
After connecting the vehicle and completing any required authorization, check that the charger shows a waiting status for the scheduled session.
The schedule on this Q6 605 configuration applies to one charging session, so set it again before your next charge.
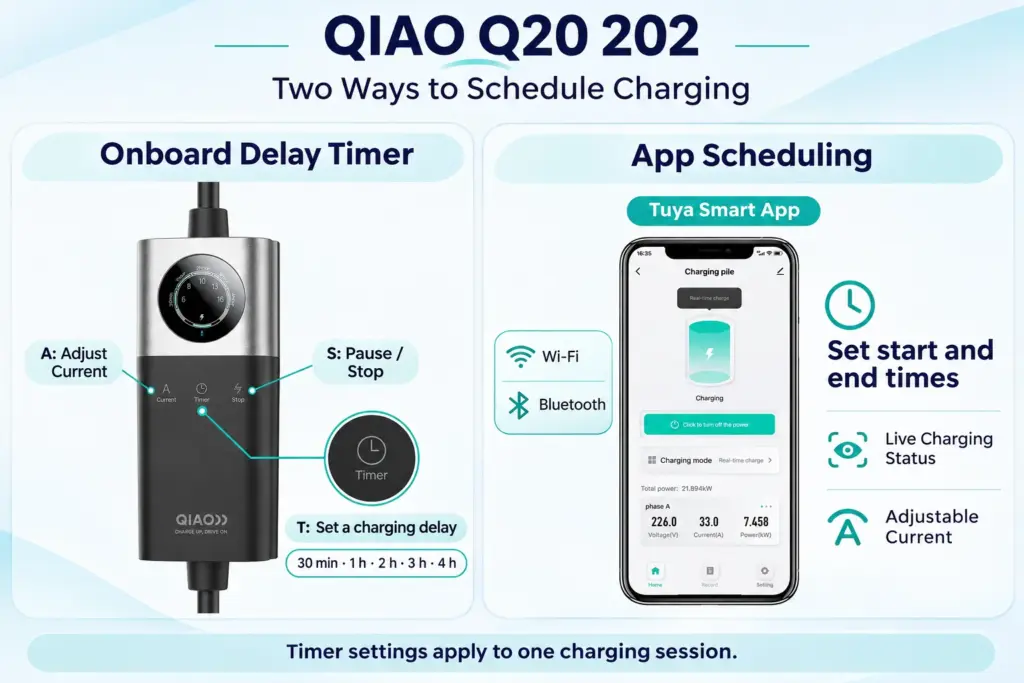
Timer controls are also available on portable equipment used at home. Selected QIAO Q20 portable chargers combine onboard timer buttons with app control, while other versions offer button controls without an app. Check the selected version’s timing options before choosing how to manage each session.
How Do You Match Charging to Off-Peak Hours?
Set your charging window within your electricity plan’s lower-rate hours, while leaving enough time to charge before departure. Check your actual tariff rather than assuming electricity is always cheaper at night.
Check Your Plan’s Times and Conditions
Find the off-peak start and end times in your electricity account or tariff details. Check for different weekday, weekend, and seasonal periods. Southern California Edison’s residential time-of-use guidance, for example, explains that prices depend on the time of day and season.
Scheduling alone does not lower your energy cost if you pay the same price per kWh throughout the day.
Check Whether the Window Is Long Enough
Estimate charging time by dividing the energy you need from the electricity supply by your average charging power.
For example, drawing 21 kWh at an average of 7 kW takes about three hours. A four-hour off-peak window would leave some spare time. Adding 21 kWh to the battery takes longer because some electricity is lost during charging.
Use your actual charging power for this estimate. A charger’s maximum rating may exceed what your vehicle accepts. Your choice of 7 kW, 11 kW, or 22 kW charging affects how much energy you can receive within the available window.
Estimate the Saving
Multiply the energy shifted to off-peak hours by the difference between the two rates.
For an illustrative 20 kWh session, paying $0.10 instead of $0.30 per kWh reduces the energy charge from $6 to $2. The $4 saving excludes fixed charges and any other fees.
Review the schedule when your tariff changes. A basic timer follows the hours you enter; it does not automatically find the cheapest periods on a dynamic tariff.
Can You Use a Household Plug-In Timer for EV Charging?
Use your vehicle’s scheduler or the charger’s built-in timer instead of a general-purpose plug-in timer or smart plug.
EV charging can draw a high current for hours. A timer’s contacts and connections can overheat if they are unsuitable for that sustained load. A printed current rating alone does not confirm suitability for EV charging. Timer manufacturer Brennenstuhl lists EV charging stations among devices users should not connect in its timer-switch safety guidance.
For a plug-in charger, use a suitable outlet and follow the charger’s connection instructions. The U.S. Fire Administration advises plugging Level 1 chargers directly into an outlet rated for the charging current.
Have a qualified electrician assess any separate external timing controls. Use equipment designed and approved for the charging installation.
Why Is Your EV Not Charging as Scheduled?
Start by identifying what went wrong: charging did not start, started earlier than expected, or stopped before you had enough energy. Each points to different settings to check.
Charging Does Not Start at the Set Time
Confirm that the schedule is enabled for the correct day and time. Check the charger’s clock or time zone where available. If your timer applies to one session only, set it again before the next charge.
Make sure the vehicle recognizes the connector. Check the charger’s instructions and complete any start or access authorization steps required for scheduled charging. Check the car’s timer too: it must allow charging during the charger’s scheduled window. The vehicle may also have already reached its battery charge limit.
Charging Starts Earlier Than Expected
Check for an active “charge now” override or a saved schedule that was never enabled.
Next, confirm whether you entered a start time or a “ready by” time. A departure-based plan may start earlier to reach its target. Tesla’s Model 3 scheduling instructions, for example, describe immediate charging in some situations when only an “End by” time is set.
Charging Starts on Time but Adds Too Little Energy
Compare the session’s actual charging power and duration with your estimate. Check for a low current setting, interruptions, or a battery charge limit below your target.
Household demand can also reduce charging power when dynamic load management is active. If needed, allow a longer window rather than increasing current beyond the installation’s approved limit.
Record the scheduled hours, actual session times, and any error messages before contacting support. These details help distinguish a timer-setting issue from a vehicle, connection, or power-supply problem.
About QIAO Charger
QIAO Charger develops and manufactures AC EV charging equipment, including home wallboxes, portable chargers, and commercial charging stations. We have our own R&D team and factory.
For home charging, selected models offer onboard timer controls or app-based scheduling. Available functions vary by configuration, so check the exact version’s timing options, control method, and repeat settings before ordering.
We can help you compare configurations based on your vehicle connector, available power supply, and preferred way to schedule charging. Share these details with our team through the website’s WhatsApp contact.
We also work with distributors, retailers, and partners delivering EV charging projects. Contact QIAO Charger about a partnership to discuss product selection, documentation, supply, and project requirements.
Set a Charging Schedule That Fits Your Routine
Choose a timer that matches your charging needs: a one-time delay or a schedule with start and stop times. Check whether it repeats, align it with your electricity rates, and leave enough time before departure.
Use one main scheduling method, keep your vehicle’s charge limit separate, and review the first session. Before relying on the plan each night, confirm that charging starts as expected and provides enough energy for your next journey.